
Circles
Here is my tutorial for double leg circles on the mushroom. What you'll read below is one of my most technical posts to date. For those unfamiliar with what the skill looks like, scroll all the way down to "Odd and Ends" for links to video clips.
For those who are working towards a circle on the mushroom (and eventually the pommel horse), I hope this guide will give you the best analysis of all the movements necessary to learn this skill. I'll just be covering work on the mushroom, since I figure if you're working the circle on the pommel horse, you're beyond the scope of this page.
Despite the tome written below, the double leg circle isn't that difficult to pick up. Well to clarify, it's a skill that takes a short time to learn, but a lifetime to master.
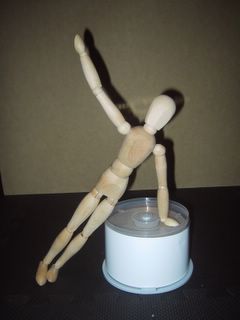
And for the first time on this page, helping me demonstrate the skill, is Chuck:
.jpg)
He's from Ikea, a town in Sweden.
*crickets chirp*
Anyways…
The Mushroom

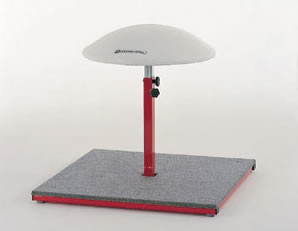
For those unfamiliar, here are pictures of some training mushrooms.
 |
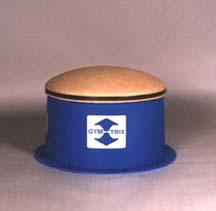 |
It's quite obvious how the apparatus got its name. The mushroom is a training device that's used to teach circles and flairs for the pommel horse.
Introduction

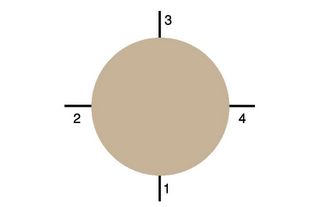
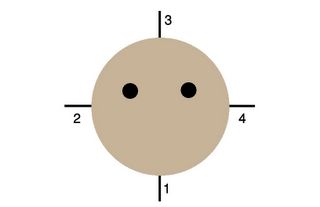
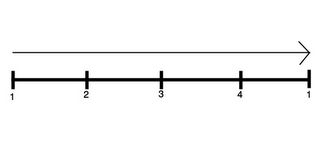
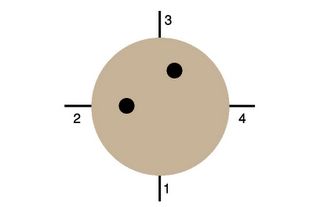
The circles I describe will be going in a CLOCKWISE direction. So switch up lefts and rights if you are practicing a counter-clockwise circle. I will be referring to various positions on the mushroom with numbers, or by simple comparison to a clock face. Here are the positions and corresponding numbers (1 being the start, of course):
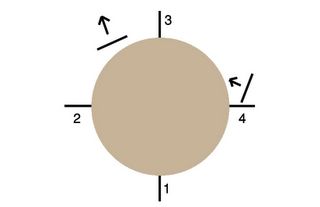
Next, we'll talk about where you should be putting your hands on the mushroom. Even though it may feel intuitive to put your hands near the middle of the mushroom, you'll actually want to put them a bit off center, away from your body as such:
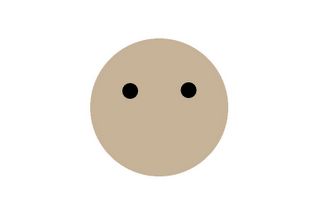
So they'll be shoulder width apart, in the top 1/3 of the mushroom. When you get your hands on the mushroom, you'll understand where to put your hands so that they're forward of the center. I'll describe the importance of this below.
So together, your hands and the numbered positions will look like this:
Now we'll learn the first position and walk around to each point on the circle. These are the GENERAL positions you want to be in when going around in a circle. I will get to the specifics of each position later, when you start getting off the ground.

The First Position

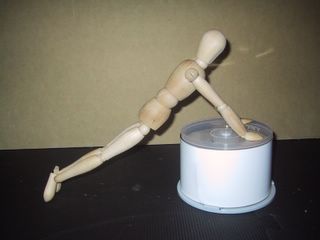
To get yourself into the correct position, place your hands on the mushroom as described above. You'll want to put your legs together, get your body in a neutral to slightly arched position, and lean slightly over the mushroom.

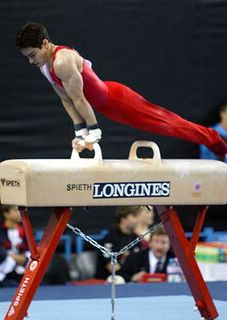
Below is David Kikuchi of Canada, showing nice form for the first position.
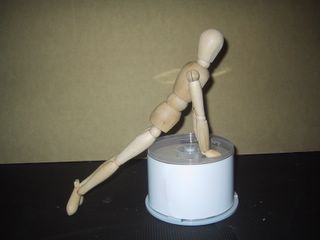
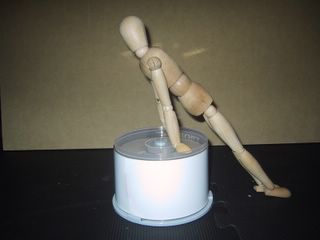
The two biggest mistakes made in this position are lifting the hips up and away from the mushroom, and not leaning over the mushroom enough. As Chuck demonstrates below:
|
|
Both will throw your circle off-kilter from the beginning, as both mistakes take your body away from the mushroom. You're going to be circling over top the mushroom, so you need to keep your center of mass over top the mushroom. Like so:
first position
Next, we'll be WALKING around the mushroom into the second position, cause you've got to learn to walk before you learn to fly.

The Second Position

For a clockwise circle, lift up your left hand from the first position and walk around 1/4 of the mushroom to your left. When you get to the second spot, you'll want to put your body in a position like so:
|
|
Keep your body in a straight position; don't sag down on top of the mushroom. You'll want to keep the hips close to the mushroom and lean over that right arm. Below is a picture of Ivan Ivankov of Belarus, in which you can clearly see the lean involved.
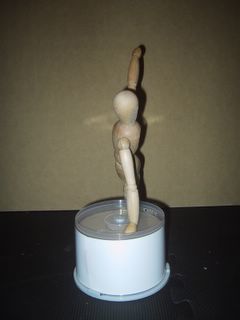
As far as the hand goes, Chuck is lifting his arm up in such an exaggerated manner so that he remembers to lift it when he's flying around the circle. I suggest you do the same.

The Third Position

Walk yourself around the circle until you hit the third position. You'll now be putting your left hand back down and getting your body into this position:
third position
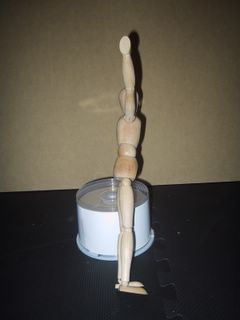
This time you'll be leaning back slightly. Most importantly, you should be trying to EXTEND your hips. Like you're trying to touch the ceiling with them. Of course, you'll be extending with your body the entire circle, which includes straight legs and pointed toes. But at the front here is where many will slack off with their body extension. The biggest mistake I see in this position is bending at the waist or "piking". You don't want to be caught sitting down on the mushroom!
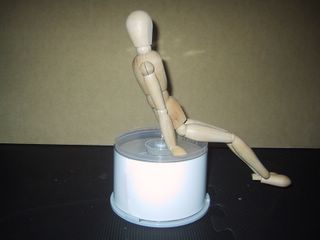
don't sit on the mushroom!
This is the reason you put your hands down where you did. With the hands on the front, there is not as much mushroom in front of you, so you won't have the urge to pike yourself in order to circle around.
So both hands are down on the mushroom. Arms are straight.
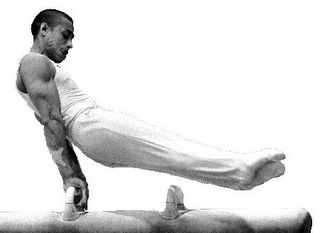
Here is a shot of Jair Lynch of the United States traveling through the third position.
The Fourth Position

The fourth position is simply a mirror image of the second position. So lift that right hand (extra high as a reminder), and remember to lean over that left arm.
|
|
After this, walk back around to the first position. Walk around the mushroom several times in this manner to get the general idea of the skill.


Ready? Let's learn how to fly.

The Cast

The cast is simply a wind-up for the circle. It will give you the power necessary to start things up.


You'll want to start by getting into the first position. Next, you're going draw your right leg back (in the case of a clockwise circle). Now it doesn't make sense to draw your leg backwards in a straight line, because you won't be traveling along a straight line. You'll want to draw your right leg back in a circular path. I think of tracing a semi-circle with my right foot for 1/4 of the circle, in other words until it reaches the "4" on our mushroom.


And raise up your left hand.


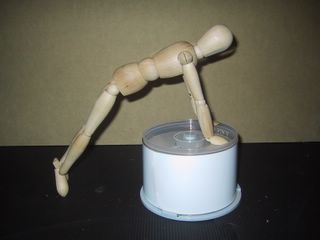
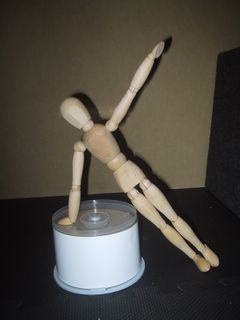
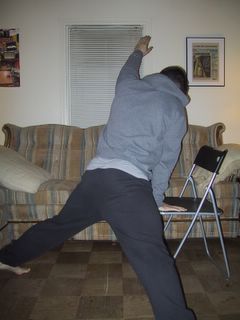
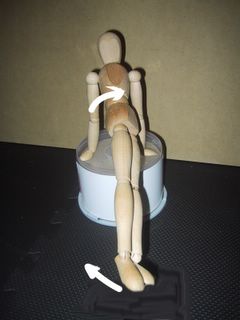
Here, in perhaps the strangest photo I've ever had taken, I'm trying to show the correct position for the cast. Notice how my hips still stay close to the mushroom (chair). Don't slack off now and pull the hips away. Tracing the semi-circle will help to keep you close.
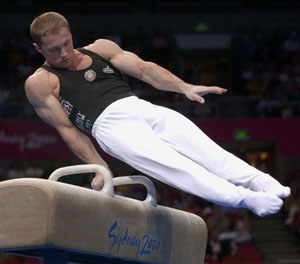
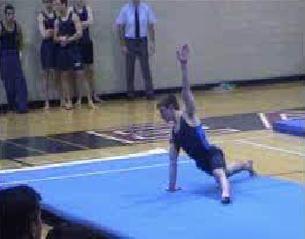
And here is a picture of Alex Schorsch, a gymnast now competing for Stanford. This is his cast for circles on the floor. Notice how his right foot is drawn back a quarter of the circle and his hand is up in the air.
After you "wind-up" you'll start the cast by doing two things SIMULTANEOUSLY. You are going to bring down your left hand and quickly slap the mushroom, while you swing your right leg around into your left leg.
The slap on the mushroom is to give your body support as you quickly pass through the first position. It is a quick slap, because you need to lift your hand up almost immediately to pass into the second position.
The swinging of the right leg should almost feel like you're sweeping your left leg out from under you. What you're really striving for in the leg sweep is to start your body off in a horizontal plane. Problems arise when you start to JUMP into the circle, rather than SWEEP.
Below is a chart illustrating the problems when you jump into a circle. The solid black horizontal line represents the ground, while the curved line represents the path of your feet.
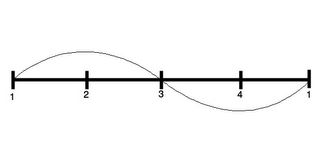
As you can see, if you jump up into the circle, you'll often travel past the second position without a problem, but then you'll lose your height and coming crashing down in the third position.
If you work on sweeping the right leg and bringing both legs around in one plane, your path will look much better:
Then you'll be able to hit multiple circles without fear of hitting the ground.

Hip Torque

You might have heard about the importance of torquing your hips for a circle. Why is it necessary? And when do you do it?

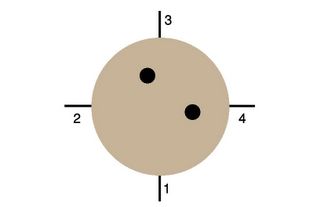
Look at the diagram below. In it you can see the direction the hips are facing as they come around to the third position. Now if you were to keep your hips pointed in that direction, there's no way you would clear the fourth position. You need to twist your hips to be able to make it around for another circle (see diagram).
The hip torque is achieved by twisting your hips in the opposite direction of your circle. If you were to stand up straight and be shish-kabobed through your head straight down to your feet, that is the axis that you will be twisting your hips around. So for the clockwise circle, twist your hips counter-clockwise. You are attempting to twist your hips so that they face the mushroom. Chuck demonstrates the twist of his hips while his body travels around the mushroom.
Just to stave off any confusion – while the arrow indicating Chuck's hip twisting looks to be going clockwise, as HE looks down at his hips he will be turning things counter-clockwise.


As mentioned, this will allow your body to come around and through the fourth position. If you find that you often hit your left hip in the fourth position, then it's probably the case of not twisting enough.


So when during the circle do you start the torque? Just before you hit the third position. If you think of the mushroom as a clock, with the first position as 6, and the third position as 12, then you want to try and twist at around 11. I've found that merely looking in that direction as you cast into the circle helps you to twist at the appropriate moment.


There is also a twisting of the hips at the 5 o'clock position on the mushroom. This will turn your hips outwards and allow you to go from the fourth position around to the second position. This twisting is very intuitive and it's likely you won't even notice it. It's the torque at 11 o'clock that you'll often have to remember to do.

Leading Parts

As you head through the circle, you'll be focusing on various parts to "lead" the way.

I
n the first half of the circle, you want to work on pushing the chest and hips through first. This will extend your circle out and prevent piking. If you think about kicking your feet through for the first half, there's a tendency to bend at the waist, which we already know is undesirable.


For the last half of the circle, you want to work on leading with the heels of your body. This will tend to keep the body straighter, so that you don't bend at the waist again. Remember one of the "don'ts" for the first position was having your hips too high? Well, leading with the hips for the last half of the circle tends to put you in such a position, which breaks that horizontal path that you're striving for.

"
Amazingly", you'll switch which part of your body leads right after you've torqued your hips (11 and 5 o'clock on the mushroom).

Lean And Push

As I've mentioned throughout this post, it's essential that you lean at every point in the circle. By leaning in the opposite direction of your feet, you'll keep your center of gravity over top the mushroom.


In order to help get into the lean, you'll want to push off with your hands as you lift them up. Nothing too severe, but be aware of the work that your hands and arms have to do. If you find yourself falling off the mushroom, or catching yourself abruptly with bent arms, then you may need to push off stronger.


For right now you want to be able to keep your orientation the same, especially if you plan on taking the skill to the pommel horse. When practicing your circles, you'll soon learn the amount of pushing and leaning you need in order to remain facing forwards.


Ultimately, there are two things that will change your orientation – putting your hands down too slow, and putting your hands down too fast.


In the first of these situations, you'll be circling along but then start to push harder, lean, and ride the circle a little longer. Your hands go down slower and you start to turn. This is called "czeching" the circle, and it starts to moves your hands into a position like so:
As you take those long wide movements, your body will shift directions in a clockwise direction (in the instance of a clockwise circle). In comparison to a regular circle, czeching a circle will make things feel slower.

The next situation is where you purposely try to turn and put down your hands as fast as you can.
This is called a "spindle", and will begin to move your hands like so:
As you twist quickly to get your hands down, your body will shift in a counter-clockwise direction (for a clockwise circle). In comparison to a regular circle, this will speed things up.


Now there's a time for each of these skills, but when you are learning the basic circle, you want to be able to keep control and remain facing forwards, putting your hands down in the same position each time. In general, I've seen more people have a problem czeching their circle than starting a spindle. So if you find yourself moving your hands around and turning your orientation with each circle you perform, then try to get your hands down faster.

Final Tip

One of the most important things I think you should keep in mind is that you have to find the RHYTHM of the skill. The circle should have a nice beat to it. Your hands should be going up and down like 1,2,1,2,1,2. If you sound like you're limping – 1…2,1…2,1…2, then work on getting the hands down faster or slower. Adjusting the amount of torque in your hips can help adjust the timing of your hands as well.

Training Progression

Now that you've got a handle on all the elements of a circle, I recommend starting from ground zero and adding on 1/4 of the circle at a time.


So after you've walked around the mushroom several times, you'll want to get into the first position, step back, cast, and stop yourself at the second position. It doesn't matter if you felt you could go all the way around. Just have patience and make sure you get the beginning down cold.


After several times casting and stopping to the second position, just add another 1/4 of the circle and trying casting and traveling to the third position. Be cognizant of keeping your cast horizontal, as well as making sure you RIDE through the second position on the way to the third. Just about anyone can make it to the third position by jumping over the mushroom, but sloppy technique like that will only make the next step more difficult, as you will have to go back and fix your technique.


I feel a indicator of good technique when casting to the third position is if you feel like you have to slam on the brakes to stop. You should feel like your body could continue traveling around if you hadn't stopped it. If you feel like you're dropping into the third position, then you very well might be. Remember that chart with the wave path of your feet? Don't do that. And as for hip torque, you can start it, but it's not essential that you focus on it at the moment.


If you feel ready, add another 1/4 to your circle and cast to the fourth position. This will test your technique more than anything. Do you jump into your circles? Then you won't make it around. Did you forget to twist your hips? Then you'll probably catch your inner hip on the mushroom. Besides remembering all the sticking points of a circle, the most important thing I can repeat is to RIDE the skill through each of the positions. Don't be in a rush to the end and try blowing past a position. The circle is a smooth, flowing movement.

If you're making it to the fourth position consistently, then taking it back around to the first position should be a piece of cake.


After your first circle, practice casting and performing one circle at a time. Get that one circle down well before you start up multiple circles.

When you begin multiple circles, remember the tips. Pushing with the hands, leaning, and really getting the hips out will power your circles around. A bit of practice will show you how to keeping the circles going. Just whatever you do, don't get lazy. Circles require constant force to keep going.

Odds And Ends

Now of course learning a circle on the mushroom is a prerequisite to performing it on the pommel horse or floor. Here are some excellent clips of circle work on both.


Pommel horse circles

David Durante from Stanford Men's Gymnastics.


Floor circles

Alex Schorsch, a Stanford gymnast, back in high school.


Anywhere else you could do circles? How about those concrete bollards you see around the city?
 |
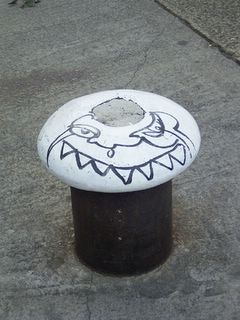 |
I've seen this done by a bboy named Kujo on the "Detours Video". A quick clip of Kujo is available here. No circling in the sample clip, but you will see a whole lot of planche goodness. The Detours Video website no longer exists, but I found another website selling the video tape here.
I mention circling on bollards simply to plant the crazy idea in your head for the next time you're walking through the city. The circle is a very fun skill once you find the flow. Good luck to everyone!
Reckon you could teach windmills sometime since you’ve added the circle? That’ll be a cool addition.
I noticed some beginners use buckets, attach a rope to it and hang it from a ceiling. Then stick their legs in the bucket and practice circles there.
I’m thinking of a swivel hook to get, so the rope doesn’t coil itself as you circle. Do you know the best play to buy a swivel hook? Ideally I want to hang it on a chin up bar (ceiling bars, not wall mounted ones obviously) and do circles under it.
I already looked at ebay and most of them require drilling holes in ceilings or threading a belt through the top which is not what I want.
Thanks.