
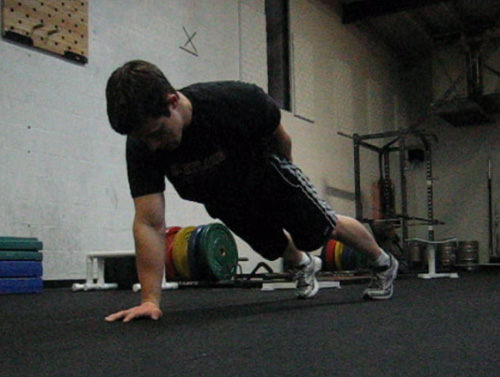
One Arm Pushup
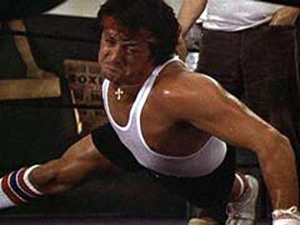
The first thing that comes to the mind of many people when they think of a one arm pushup is the music-filled training montage in Rocky where he’s banging them out one after another.
Or perhaps you think of Bruce Lee and his famous two finger pushups. What guy hasn’t had a Bruce Lee poster hanging on his wall at some point?
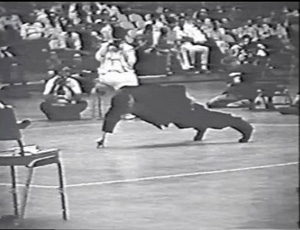
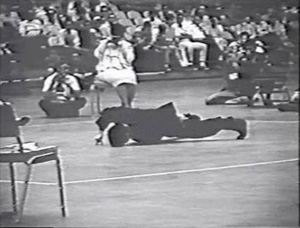
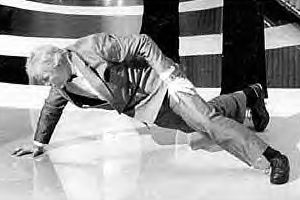
And then there’s the tough dog, Jack Palance, who decided to show everyone at the Oscars one year that he still had it.
The one arm pushup has been associated with “tough guys” for as long as people have been training. And why not? The one arm pushup is certainly a tough exercise and a skill that one should learn when regular pushups get too easy – which for most is fairly quickly.
Basic Technique – Arm Out
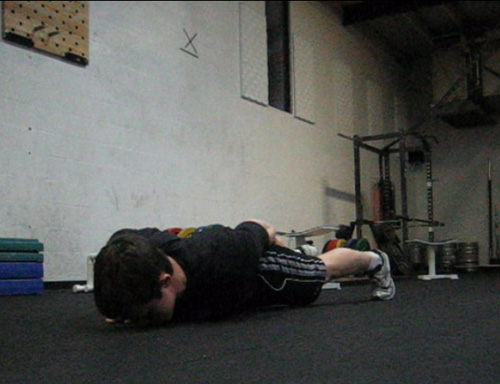
The “basic” technique for a regular one arm pushup is anything but basic. First off, there’s two basic variations one can practice, with each one having its own subtle differences in technique. I’ll start off with the Rocky/Jack Palance type pushup, which I’ll refer to as “arm out” style. Simply named because the arm is out away from the body, which forces the body and legs into a certain position.

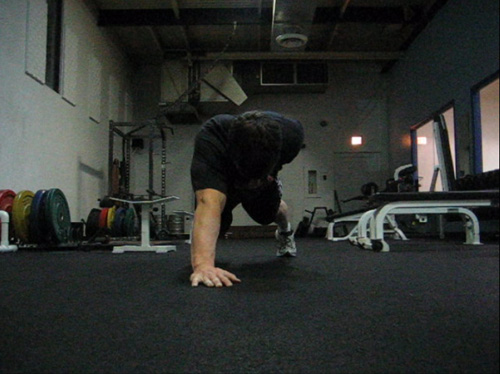
Top Position
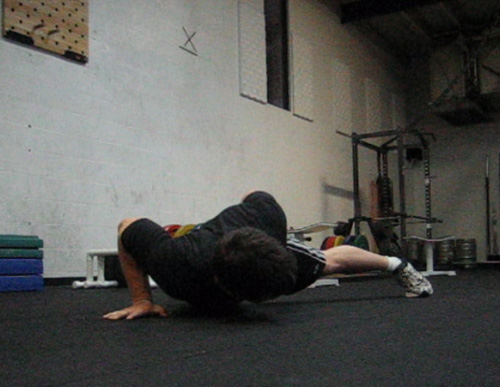
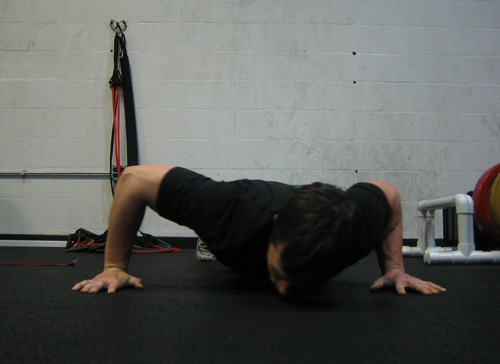
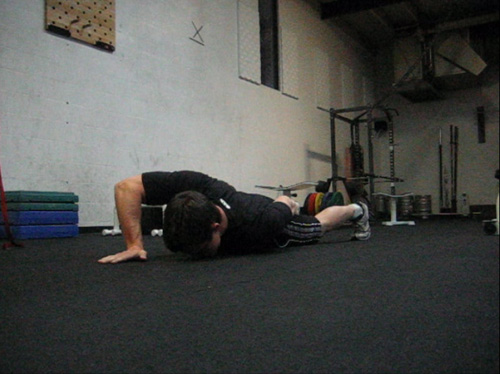
Bottom Position
As you can see, the legs are spread a bit wider than shoulder-width apart to balance the body. With the legs in this position, one will feel a sort of cross-tension through the body – going from the pressing arm, across the midsection, and into the opposite leg. This tension is something that will occur naturally as you balance in the position. Visualizing the tension will help you realize where you need to be applying the most pressure, namely the pressing hand and opposite leg.
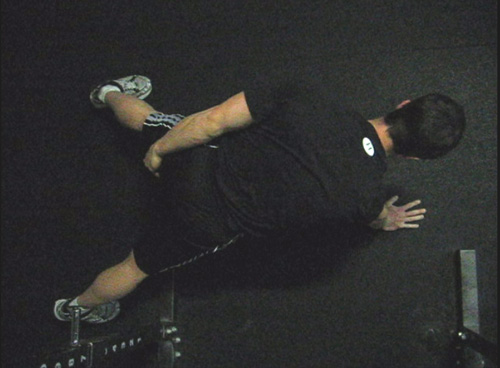
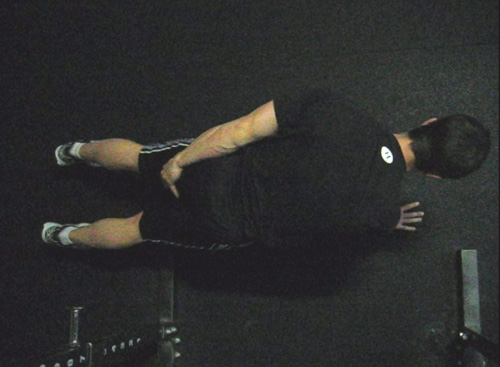
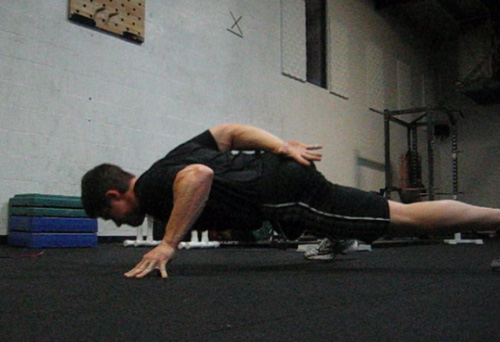
Top Position, viewed from above. Notice a line can be drawn from the hand, across the body, and down the opposite leg.
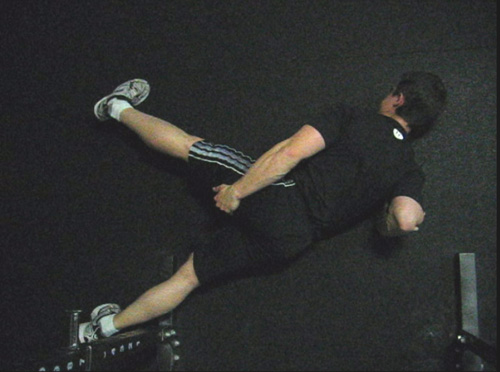
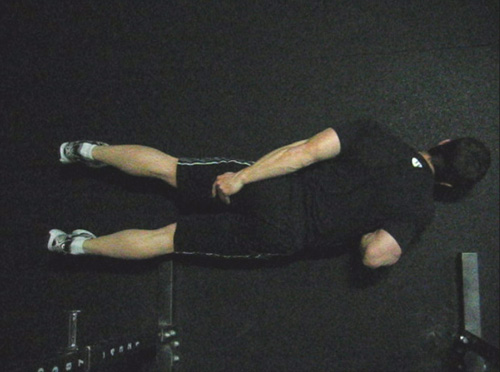
Bottom Position, viewed from above. Again, notice the line from my right elbow to my left foot.
With that tension, you must take care to keep the other foot on the ground for now. Things will change with the one arm/one leg variation, but we’ll come to that later in the tutorial.
You can turn your torso and legs away from the pressing hand like good ol’ Rocky here:
But generally speaking, keeping the body square and level with the ground will be harder to push up. Whichever way you are working, make sure to keep the body tight and not let the hips sag down or stick up too high – this is proper form for a regular pushup as well.
As for the non-pressing arm, tuck it behind your back so that you can keep better balanced.
Basic Technique #2 – Arm In
The other basic technique is something that I’ll refer to as “arm in” style. As you may have guessed, the arm is in close to the body for this push-up. I feel this technique to be a bit harder and more technical that the arm out style. It also relies on more strength in the triceps than the previous arm-out style.
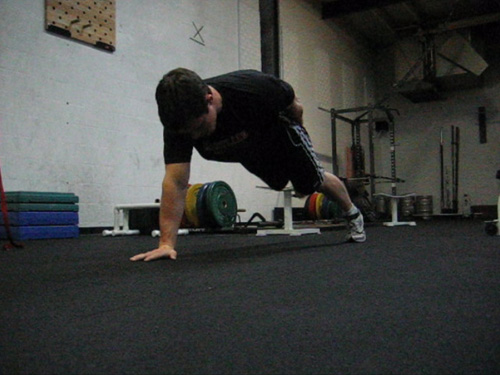
Top Position
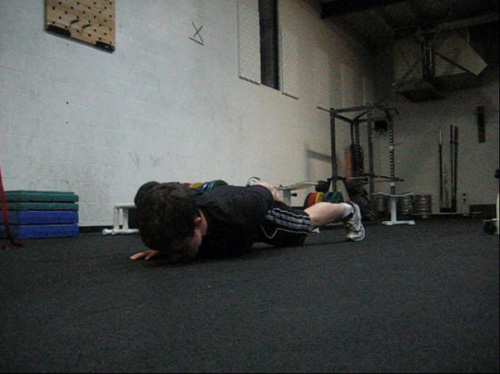
Bottom Position
The first difference is hand placement. Put the hands down by the side of the body so that the upper arm is about a 45 degree angle with the body. This differs from the approximate 90 degree angle in the arm out styles.
Top position, viewed from above.
Bottom position, viewed from above.
I understand that the body shifts over slightly for both the arm-in and the arm-out variations and that it’s not a geometrically perfect 45 and 90, but a side by side comparison of the arm-out (left) and arm-in (right) style should illustrate my point in the difference of arm positions.
The legs should also be closer together. Rather than splayed out, try to keep them about shoulder-width apart. They don’t necessarily have to be touching, but keep them close. Because the arm and elbow are in closer, the leg can be in closer as well. The cross-body tension exists just like with the arm-out style, although it’s a bit trickier in this case.
The difficulty comes with the arm. If you don’t keep it in tight enough, you’ll lose the necessary tension and balance, falling onto the shoulder of the non-pressing arm. In creating the necessary tension, let’s start with the hand. Although the hand is not moving, you’ll want to imagine you are trying to twist it into the ground. For the right hand, imagine you are twisting it clockwise, for the left it’s counter-clockwise.
By twisting the hand from the start, the arm and elbow will naturally want to pull in closer to the body than if you weren’t applying any force through the hand. Again, the hand is not moving, but this act of trying to twist it will create a chain-reaction that carries up and into the torso, and ultimately creates the proper tension.
This is also why the direction you twist the hand is dependent on which side is pushing. If you are pushing with the right hand, the clockwise twist will bring the right arm in closer to the body. A counter-clockwise twist with the right hand brings the arm away from the body, which is not something we want with this style.
With the hand and arm in place, the final and perhaps most important piece of the puzzle is creating tension in the back. When I say back, I specifically mean the “lats” or latissimus dorsi – which are those large “wings” of muscle on each side of your torso. You want to press the arm into the lat.
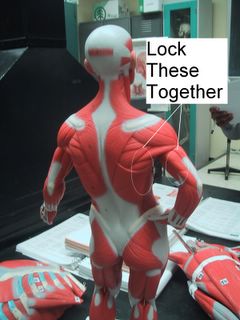
With the two pressing against each other, a greater tension is generated than if the arm was free from the body. It’s the same technique I first described in the back lever. Or that I advocate when working heavy dips. Although the one arm pushup is a pressing skill, using the back to stabilize will allow you to be much stronger.
At the top of the pushup you’ll want to focus on the hand twisting and arm turning. Even though the back and arm aren’t touching yet, still flex the lat before you descend. It’s much easier to create the necessary tension at the top and hold it through the skill, then to lower yourself down and try to create the tension afterwards.
Hopefully at this point you’ve created the tension in your upper body, have your shoulders and legs square to the ground, and can feel the cross-body tension to the foot opposite the pressing arm.
And of course, one should always try to touch their chest to the ground. Don’t give me half reps. I don’t care what Rocky does.
If you’re finding this all a bit too hard, I’ve outlined some progressions below. If you’re finding this all a bit too easy, then skip to the end and check out some other variations.
Progressions
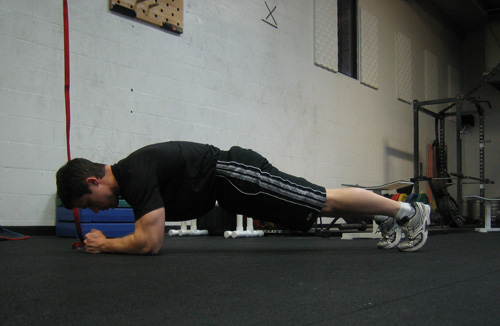
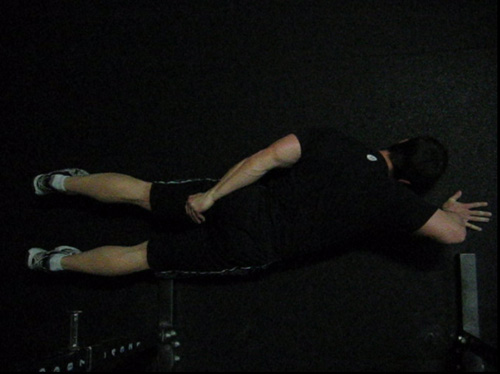
Front Plank
Despite being a basic stabilization exercise for the midsection, the front plank will help teach the beginner how to keep their body tense in a similar, but easier, way than the one arm pushup. Simply get down on your forearms and toes, lift your hips, and hold your body in a straight line. Make sure your abdominal muscles and your butt are tensed so that your hips aren’t sagging. If you feel a pinching in your lower back, then you’re probably letting the hips drop and the back arch too greatly. Don’t do that.
After you’ve gotten use to the front plank with both forearms and feet on the ground, try to lift up an arm and maintain the same position. You’ll start to feel that cross-body tension I discussed in the previous section. Keep the chest facing the ground and try not to let the body twist.

One arm raised, more tension is required.
If that’s feeling good, then lift up the leg on the opposite side. You’ll then have just one forearm and the opposite side foot on the ground. Eventually try to hold yourself up on one hand (instead of forearm) and one foot. Then space the hand out farther from the opposite foot. Then put your hand on a medicine ball. Let me repeat – for each progression make sure to keep the midsection and butt tight and don’t let the hips drop! This is a similar type of tension that’s required during ab wheel rollouts.
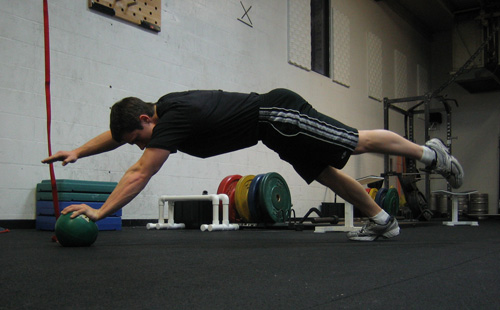
Up on the medicine ball with one hand and one foot.
Elevating the Upper Body
This is one of the most naturally progressive exercises one can do to get the one arm push-up. If you can’t do a one arm push-up on the ground, then raise your upper body and put your hand on something until you can do the push-up. This might be a chair, a desk, a dresser, heck you can even start with the wall.
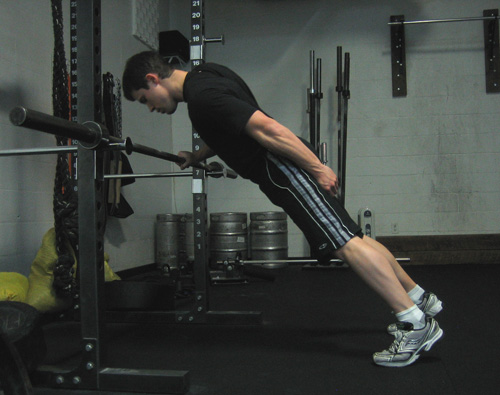
Using a bar in a power rack.
As you raise your body up, you’ll be pressing less and less of your bodyweight. Push off of lower and lower objects until you find yourself on the ground. Really, that’s about all you need. Make sure to maintain the proper tension in the body as was described above. Work on this progression alone and you’ll get the skill.
One Arm Emphasized Pushup
If the previous progression still feels a bit difficult or you want to simply vary your exercises, then do a pushup, but put one arm out and away from the body. I start with a normal pushup and think of my hands and feet on the corners of a rectangle. Then I move the assisting arm out and way from the body.
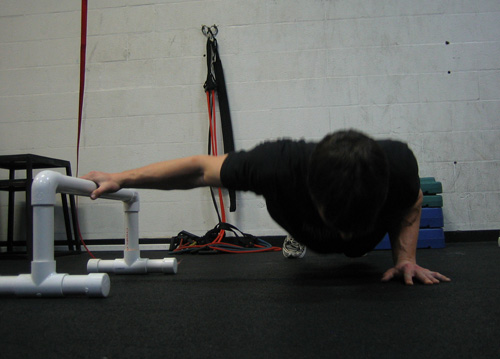
Right arm assists the left in a one arm pushup.
As you can see in the picture above, My main pressing arm (the left) is still close to my body. The biggest mistake I see is that people tend to let their bodies float over to the middle so that there’s no longer emphasis on one arm.

Incorrect form. Left arm is no longer emphasized as much.
The assisting arm that’s to the side can be placed closer or further away from the body depending on how much assistance you need. You can also try putting it up on a bench, box, or something else that lifts it off the ground. (I use a parallette in the picture above). Finally, try to assist with just a couple fingers on the ground or block, instead of the entire hand.
Typewriter Pushups
Another great exercise that accomplishes a similar training effect is the typewriter pushup. Aptly named as your body skims along like the cartridge in a typewriter. In order to do these, you’ll start in a regular pushup position with your hands wider than shoulder-width apart. Shift your upper body over one hand and lower down to the ground, putting more emphasis on one side. Once you’re at the bottom, skim your chest above the ground until you reach your other hand. Once you get there, push back up.

The Typewriter Pushup – lower to one hand, skim your chest along the ground and then push up.
You can work in a circular motion like this for several reps, then switch and circle back the other way.
Variations
Fingertip Pushups
Let’s start with Bruce Lee’s famous variation – doing one arm pushups on your fingers. Not much to say here other than progress SLOWLY. This should takes a couple months to work up to, especially if you are new to intense finger conditioning. Rushing too fast and trying to take away fingers from the press can injury you and cause quite a lengthy recovery. Also notice the position of my fingertips – they are the same as when trying to do an L-seat on the ground.
I find the “arm-out” style to be the easiest when working fingertip pushups, but if you look at Bruce Lee…
…you’ll see that he has his arm a bit more over his head. I might call this the “Lalanne” style, which I’ll describe below.
Lalanne One Arm Pushup
This variation is named after fitness celebrity and lifelong physical culturalist, Jack Lalanne. Jack is an amazing guy and if you’re not familiar with him, do some research immediately. He would oftentimes perform pushups with his arms stretched way out in front of his body.

And while it stays up on Youtube, here’s the man himself doing these pushups with both two and one arms.
This variation puts more stress on the lats (latissimus dorsi), and the whole movement feels similar to a pullover. While impressive looking, and still fairly difficult, I never found this quite as difficult as the basic version. If you focus on pressing the hand directly away from the body in a straight line, then you’ll keep adequate tension and easily perform the pushup. And again, the tension in the upper body is similar to that needed in the ab wheel.
While you can progress to a fingertip variation, let’s just start with our palms flat on the ground.

Lalanne Pushup. Top position, viewed from above.
Lalanne pushup. Bottom position, viewed from above.
If you’re pushing your hand away from your body (in the direction of your fingers), then your elbow will naturally bend into the position that you see above.
In order to work up to these though, feel free to following the same progression as the basic one arm push-up. Perform the skill on an elevated surface and eventually work on lower surfaces until you’ve reached the ground.
Top position.
Bottom Position. Notice the elbow bending outwards.
And because it is an unusual pushup, here’s one more angle of the skill.
Top
.jpg)
Bottom
One Arm/One Leg
For the arm in style, I don’t find this variation much more difficult than a regular one arm pushup. It just looks a bit flashier. The reason this isn’t much harder is because of the cross-body tension already present in the basic skill. With such tension, the extra leg becomes irrelevant. In fact, if you pressed down with the extra leg during the arm-in style, you’d tip your body into the ground anyways.
One arm and one leg. Notice the striking similarity to a regular one arm pushup.
Bottom of a one arm and one leg pushup. I swear my right leg is off the ground!
For the arm out style, lifting the extra leg makes the skill a bit harder, as a point of contact is lifted. The arm is not “connected” and pressing into the back, so holding tension and balance becomes a bit harder.
Top position

Bottom position
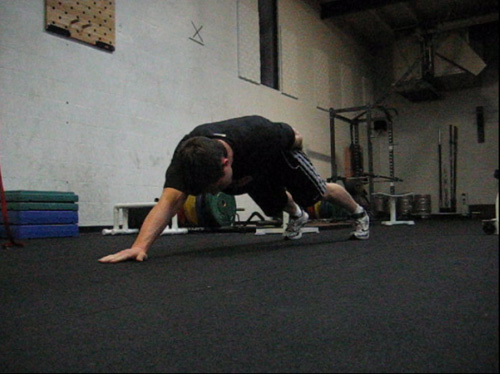
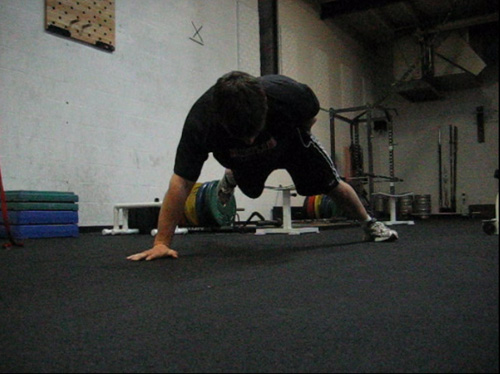
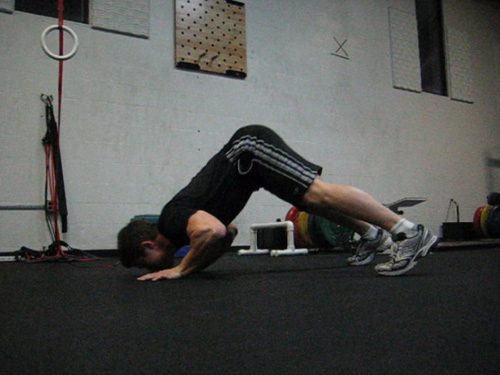
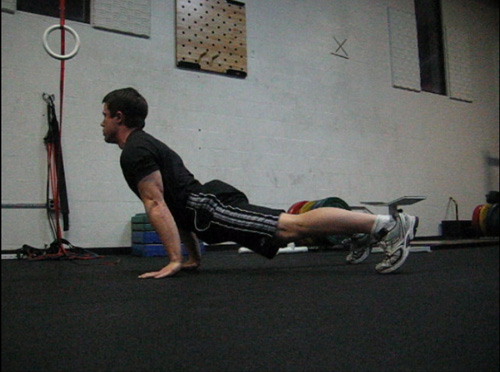
One Arm Dive Bomber
The one arm dive bomber pushup is a fairly hard variation, given the amount of triceps and shoulder strength required. While this can be done with feet close together, I prefer a slightly wider stance if doing multiple repetitions. This allows for a bit more speed with the exercise, as balance is less of a concern.
With the unusual path that your body is traveling, my best piece of advice is to just try and keep your chest square with the ground. Too much twisting one way or the other will throw you off.
Start

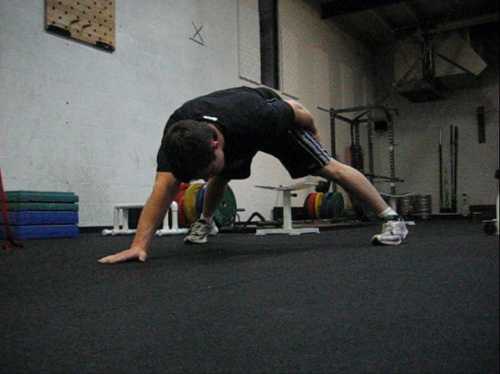
Middle
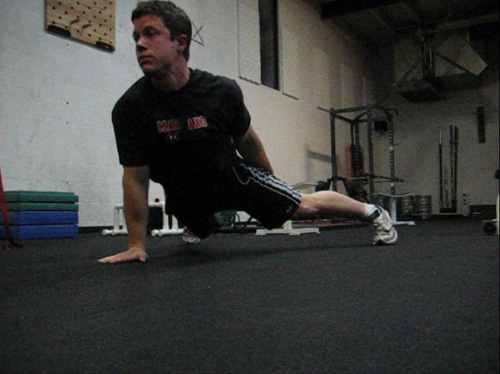
End. As you can see by my face, it’s a tough variation!
The beginning part of the pushup feels similar to a LaLanne one arm pushup (described above) and should therefore be treated similarly. Press away from the body with the pressing hand. As you descend to the ground, your elbow will naturally bend off to the side, so that your body may get as low to the ground as possible. Again, my best piece of advice is to just focus on keeping the chest square.
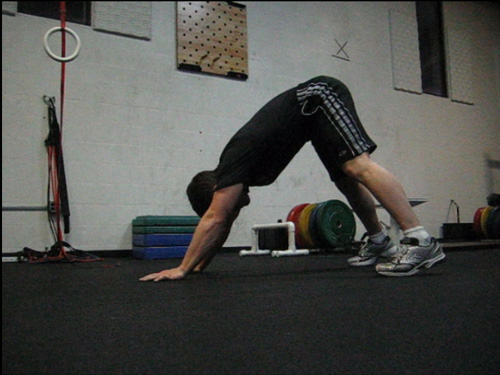
Progressions for this variation all start off with being highly proficient in the regular dive bomber pushups – as shown below.
|
|
|
|
| One | Two | and Three |
Add weight to the regular dive bomber pushups via a weight vest if you can.
And as with the regular dive bomber, you may choose to start the next repetition of the exercise by simply lifting your hips up (going from “three” to “one”) or by diving back down again (going from “three” to “two” to “one”). Obviously the second option is harder.
As with the other variations, you may also try these on an elevated surface and eventually lower the surface until you’re on the ground. When doing the one arm divebomber on an elevated surface, make sure to dive down deep enough. It’s tempting to simply dip down an inch or two and falsely believe you’ll build the necessary strength.
Clapping/Explosive
Watch that Rocky training montage again, and you’ll see the Italian Stallion bang out one arm pushups in rapid succession, switching from arm to arm. Try this variation when regular one arm pushups become too easy. Just like Rocky, I found that spreading your legs apart and putting your arm out to be the easiest variation in which to explode upwards and switch or clap your hands in between repetitions.
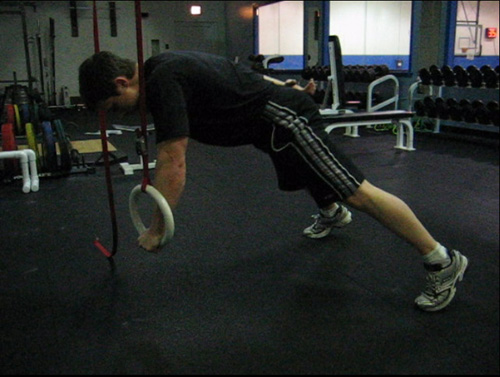
Ring
If you have a set of gymnastics rings, then a one arm push-up with them can add the challenge of instability. An arm-out, legs spread stance seems to work best for these.

Conclusion
The one arm pushup is a challenging, but very attainable skill. While you may find that your have a favorite version, try to work and master each type. Don’t limit yourself to regular pushups if you really want to build up your strength!
Good luck with your training!
bravo!! help me a lot
great pictures, great instructions.
keep it up.
This is great! Thank you! I was looking for some progression tips working up to this, and now am reading Convict Conditioning too and following that as well!
Is it possible to perform an arm-in, one handed pushup with heels together and keeping the torso straight?
Take a look at my YouTube channel for the best attempt I have. You can decide how straight I keep the torso.
Thanks, this helped.
Hey Jim,
Of course, as with the rest of your site, this is an excellent, in-depth tutorial. However, there is one thing I would like to point out to you. Your demonstration of the Lalanne push up seems to be a bit different than what Jack did on his TV show. If you watch the clip closely, he keeps his elbow straight throughout the movement. It is more akin to a 1 arm ab wheel rollout, turned into a push up rather than using the wheel.
Also, I am wondering if you intend to do a planche or tiger bend tutorial? I know you’re pretty busy these days but I know you can do a planche, and you’ve covered what I consider the 2 prime high level pulling exercises already (one arm pull ups and front lever rows), and, obviously, the one arm push up is the antagonist to the one arm pull up. Seeing as the planche is the antagonist to the front lever, it would be awesome. Tiger bends, obviously, are a bit of a one-off exercise, but still is a pretty damn beast skill.
Cheers
Robby,
Thanks for pointing out the subtleties of the LaLanne pushup. Whichever way the athlete does it, it’s a challenging skill!
I wanted my planche stronger before I started writing a tutorial on it. Same thing with my one arm handstand. They are both feeling pretty good now, so I’ll put it on my list of things to do.
Didn’t have a plan to do the tiger bend tutorial, but I’ll consider it as well. Always so much to do!
Hey man, I really appreciate this tutorial.
I have a question though, as I going for both the one arm pushup and one arm chin up
I was wondering how the difficulty of the strict legs close one arm pushup compares to a one arm chin up?
I ask because I have goals set that I want to achieve in time for Christmas, and one of them is a one arm chin up, but I want to find an equally difficult chest pushing movement to shoot for.
So I was wondering if the difficulty of the strict one arm push up compares well to a strict one arm chin?
Thanks!
James
One arm chin-up is harder for most. You can work on an assisted one arm handstand pushup. That feels similar.
thanks a ton.
I’ve been working the one-armed-pushup elevated on my desk and today I just moved down to my chair. I’ve been doing arm-out in a way that my elbow points directly out to my side, not towards my waist. It works pects, abs, and triceps a lot more evenly. I’ve been working hard to keep my back straight, and not bend it like Rocky.
In this progression, I’ve been moving my feet as close together as possible — the closer I can move my feet in and perform a clean, straight-backed, arm out pushup, the more I know I’m advancing — again, with my arm out. It’s only been a few weeks and I can see the results on my torso just as much as on my arms.
To me, this tutorial is the bread and butter of your whole website because of the potential it has for increasing strength across the entire upper body and preparing a person to do the planche and handstand pushup and L seat.
Just my two cents. I love taking time to myself and working out in my own bedroom. Thanks for all your work.
Hi jim,
Great tutorial on one hand pushup, i wanted to do some planche pushup can u give me some tips on how to do planche pushup
Once again thanks for the tutorial
Great article. Thanks for confirming the correct form for a one handed push up.
Great tutorial, which helped to demystify this seemingly amazing feat. Looking forward to mastering it / them.
Hey Jim,
This is an awesome tutorial. I’m currently working on the OA pushup at around a foot and a half away from the ground. Hopefully soon i can close that distance. Quick question. I’ve heard a LOT about balance between muscles, i.e. if you do pushups/bench press you must also do pullups/barbell rows. If I’m training for the OA pushup, should I also be training for the OA pullup (considering I’m not very interested seeing as its a very injury prone exercise)?
The one arm pushup and one arm pullups are light years away in difficulty. It’s not a fair comparison. Just get your normal chin-ups in!
Hello Mr. Beast
I thought the same; but, if we exclude the standard feet-out one-arm push-up, then I realized that out in the field- i.e. YouTube- we don’t see nearly as many well-executed feet-in, arm-in one-arm push-ups as we do one-arm chin-ups- in fact I saw only two (almost perfect), one of them yours. One-arm chins seem not to be as rare, and I’ve seen them done for reps with perfect technique. Someone remarked that the only perfect (“regulation”) one-arm push-up he’d ever seen was by Batman- and that was in a cartoon. I’m going to get a solid Batman push-up one of these days, but I suspect I’ll get a dead-hang one-arm chin first.
Thanks for the advice.
WOW! Thanks a lot!
okay i’m on it. stay tuned.
Hi
Which pushing-muscles do this exercise generate the must amount of tension on? Chest or triceps?
:-)
Triceps
Is the lalanne one arm push up effective in arm out style?