
Ab Wheel Rollout
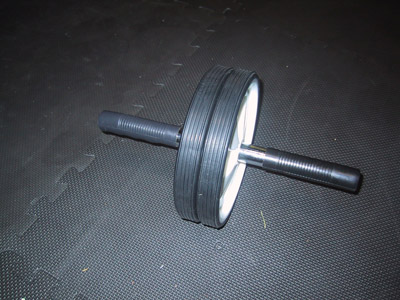
The ab wheel is an inexpensive and seemingly innocuous device that presents quite a challenge. It seems simple enough…
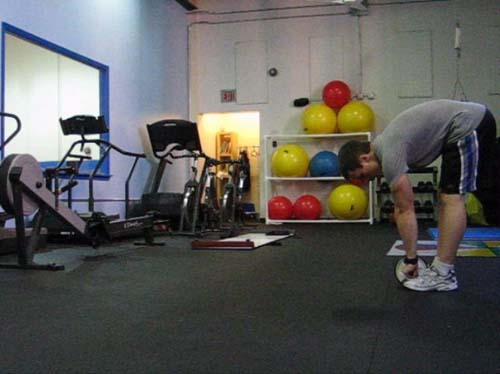
Start with the wheel at your feet, with your arms and legs straight.
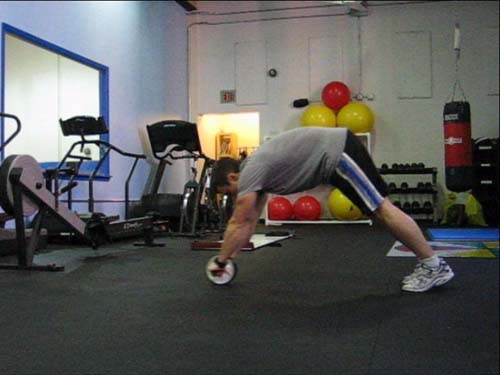
Now roll the wheel out…
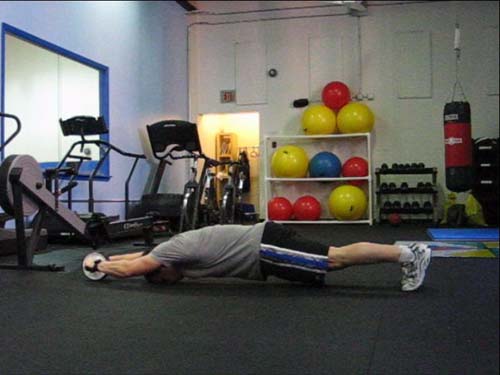
…until you’re laid out as far as you can go, but still under control. Then pull everything back until your hands and feet come back together. It sounds simple, but after a couple of times of splaying out on the ground you’ll realize the difficulty involved.
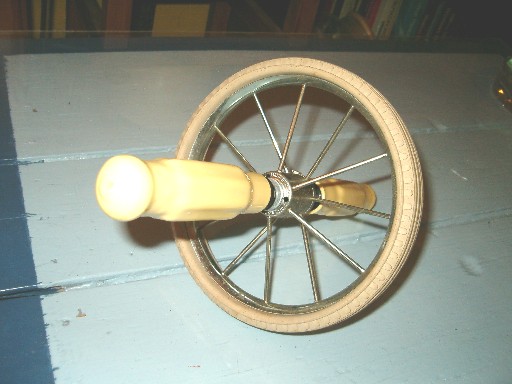
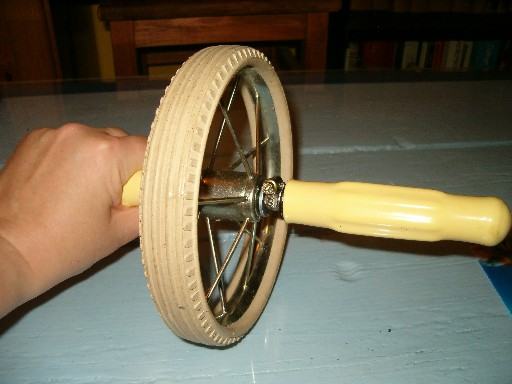
Apparently this device has been around for quite some time. A visitor to the site sent me these great pictures of an ab wheel owned by his grandfather. He guesses that the wheel is from the sixties or earlier!
But anyways, an important role of your midsection is stabilization. This skill tests your ability to maintain muscular tension through the midsection and maintain correct form.
To understand how to do this correctly, you first have to understand what your midsection is doing.
Pelvic Tilting
What you’ll first have to learn is how to control your pelvis and midsection. The pelvis can be tilted forwards or backwards, which will change the curve of your lower spine. By tilting the pelvis backwards slightly before you roll out with the wheel, you can engage the abdominal muscles much better, keep the midsection tight, and be able to pull yourself back up into standing position. Note that moving the pelvis does not involve moving the shoulders.
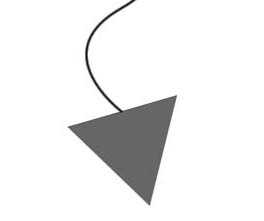
The abstract diagrams and pictures below are to hopefully give you a better idea of pelvic tilting. They’re no anatomical drawings, but they’ll serve the purpose. Both the diagram and picture are facing to the left.


Neutral Pelvis
——————————————————————-
Pelvis tilted forward (large arch in back)
——————————————————————-
Pelvis titled back (flatter lower back)
——————————————————————-
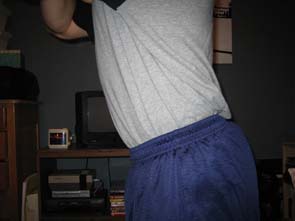
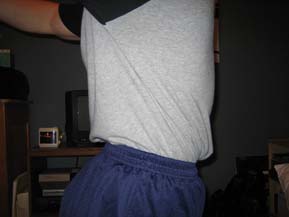
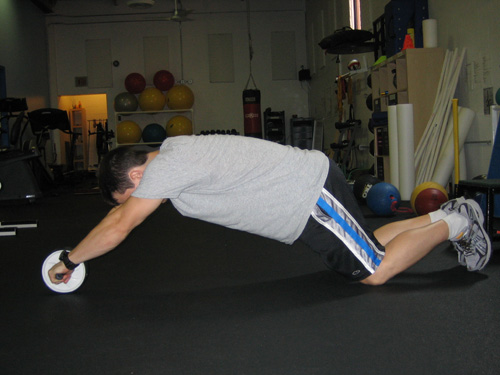
So when you’ve got your hands by your feet, ready to roll the wheel out, tilt that pelvis backward slightly. Next squeeze the abs and try to hold everything in place. It can probably be seen best in the picture below. My lower back is flat as I roll out.
Your midsection (represented in red in the picture below) now has the job of keeping your pelvis in position (tucked to neutral).
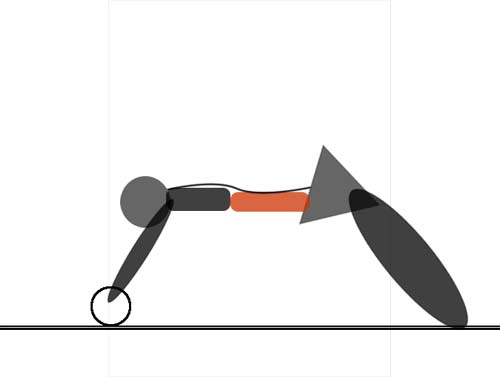
And here lies the challenge of the skill. As you wheel farther out, more stress is put on the abs to stabilize the body. If your midsection is not sufficiently strong then you’ll lose that position, your pelvis will tilt forward, your back will arch, and you’ll often fall down.
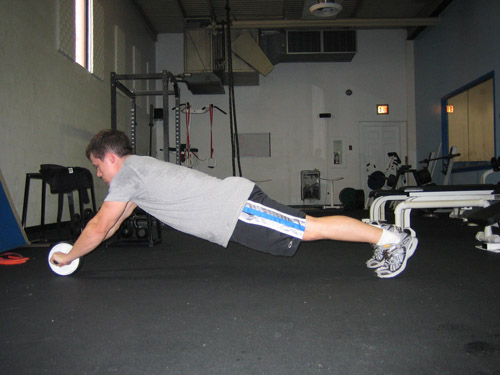
Therefore, if you ever feel your back arching greatly (like picture above), it means stabilization has been lost and an easier exercise needs to be chosen.
The Finer Points
– A slight pinching in the lower back, indicating a large arch in the lower back, is the best way to determine that you’ve lost good form.
– Keeping the head down and tucking the chin as you roll out helps to keep the back flat. The spine follows the head, so if you’ve got your head sticking up, then your back will have a greater tendency to arch.
– When rolling out, I use my chin as the gauge to know when I’ve gone out far enough. When I can touch it to the ground, it’s time to roll back up.
– You can also see that you’ll roll right up onto your toes as you roll the wheel out. This should be fairly natural to do, as there’s no way to roll out with your feet flat on the ground.
– Squeeze the abs and get some tension in them before you even roll out. If you try to squeeze your midsection only when things start getting difficult, then you’ve probably already lost much of your form. Squeezing the butt also helps keep tension in the whole area.
– Make sure to keep your upper body tight as well. The midsection is generally the part that fails, but the arms and upper body need to stay tight as well. Squeezing the handles of the wheel helps greatly.
– Think of the movement simply as your body jackknifing open, then coming back together. The hands and feet should be moving away from the center of the body at the same pace. I always felt this visualization helped keep proper form. It’s the upper body and the hip flexors that are doing the movement, while the midsection stabilizes.
– Keep the arms and legs straight!
Progressive Exercises
From the knees
The first exercise to master is rolling out from your knees instead of your feet. Remember all that we just discussed – tucked pelvis, tucked chin, straight arms. If you can’t roll all the way out right now without losing form, then practice rolling out only part of the way. You can also try rolling into a wall. Use the wall to stop the wheel and limit your range of motion. Move back from the wall (and increase the range of motion) as you get stronger. Soon you’ll be rolling from the knees with no problem.
Feel free to pad your knees with something as well. Too much movement and grinding with no padding underneath isn’t the best thing for them.
The Decline
Rolling from your knees shouldn’t take you too long to master at all, if you’re diligent in your practice. Unfortunately, progressing from your knees to your feet is a big step.
I would NOT use the wall anymore to limit your range of motion. I think using the wall is great when you’re first starting off, but I found it detrimental when learning to roll from my feet. When maintaining a lot of tension in the midsection, rolling into the wall tends to make you lose that tension. When the midsection goes loose for even just a split second, the pelvis will tilt forward and the form goes to hell.
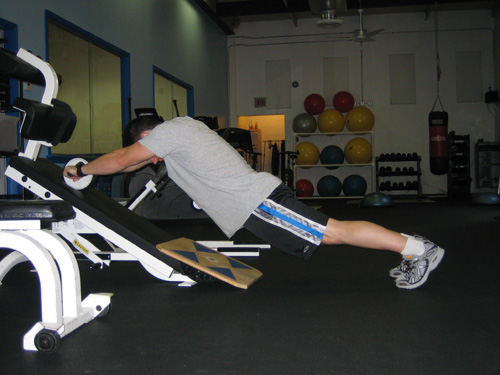
What I found worked much better was to find a decline to roll up.
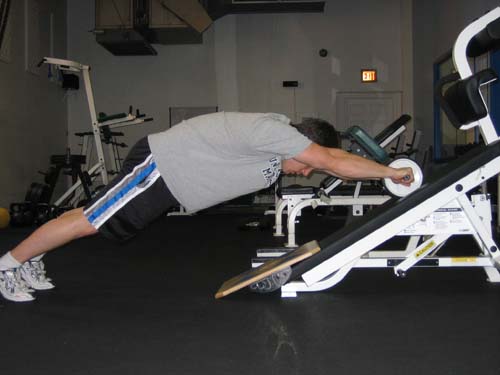
Here I’m using a decline crunch bench along with a balance board to make a fairly seamless transition from floor to bench when I’m rolling. You could use some plywood over some steps, or an inclined sidewalk, or any number of other set-ups. Look around and be creative. Improvise.
From here it should be obvious the advantage that the decline provides. Rolling up the decline takes some weight off of the end range, which is the hardest part of the movement.
By rolling up the decline you are making the motion easier, but still getting a full range of motion. I feel this is the greatest advantage that this method has over simply rolling into a wall.
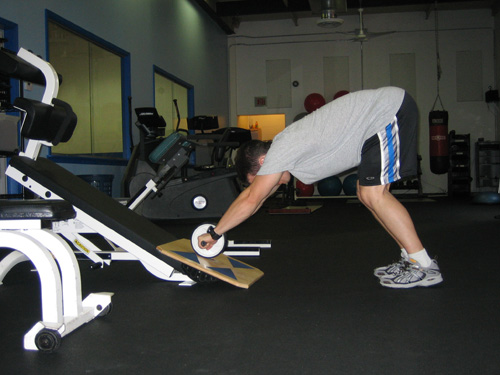
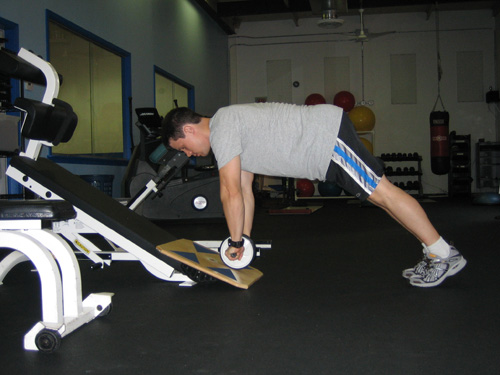
So work on rolling up the decline and take small steps away from the ramp as things become easier. The more of the roll that is on the decline, the easier the movement will be. Keep stepping back from the ramp and soon you’ll be using the ramp for just the last bit of the movement, then you can start trying it with nothing but floor in front of you.
Honestly, this is the only advanced progressive exercise you need. Just focus on maintaining good form throughout and try to step back a bit further each workout. I’d usually do two to three sets of five reps, which would give me a good workout without having my form suffer at the end.
Common Mistakes
Bending the legs
If you can’t reach your feet without bending your legs, work on hamstring flexibility! While rolling back, make sure that your legs stay straight as well. Bending the legs on the way back brings the hips back early, shifts weight to the feet, and makes the exercise easier. (which we don’t want)
Bringing the arms under the shoulders
On the way out, some keep the wheel under their shoulders like they’re wheeling out into a pushup position. This makes the movement easier at the beginning, but hard to keep the correct tension in the midsection when you go to stretch out completely. Not a good idea in any means.
On the way back there’s also a tendency to bring the arms back in as soon as possible. Throwing them under your shoulders rather than bringing them back as smoothly takes the stress off the midsection and makes things easier (which we also don’t want).
Losing Tension
As we mentioned previously, if your body looks like the picture above then stop the exercise! There is not adequate stabilization in the midsection and the lower back is arching greatly. Try something easier.
Additional Challenges
If rolling the wheel as described above becomes too easy, there are several different ways to further challenge yourself:
– Putting on a weight vest
– Raising your feet up higher than your hands
– Grabbing the wheel with your palms facing upwards
– Rolling out on one arm and/or one leg
Rolling out with one arm is best accomplished by splitting the ab wheel in the middle like so:
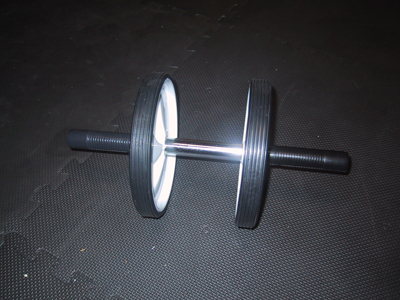
The cheap wheel that I picked up is able to do this quite easily. You may have to improvise if yours is different. You can grab a similar wheel from RubberBanditz.
I hope I’ve given you a way to work up to a standing rollout, as well as ideas for additional challenges. The ab wheel is a simple device that lets you train stabilization, which helps with many other bodyweight exercises. Good luck!
just got an ab wheel so i’ll be taking your advice. i searched all over for progression but should have thought to come here first!! lesson learned.
cheers
This exercise is easy for any fit person under 220 lbs.. have you seen any large people do it or small people with added weight to make them like 250 lbs ? My friend is only 210 and does over 200 reps at once from his knees .
This is Ben Bruno doing it with an 80 lb weighted vest. I don’t know how much he weighs, but I can guarantee you that it’s more than 140 lbs. Ben is the man.
http://www.youtube.com/watch?v=5Tc7yKQysVQ
That bloke is bending his legs a little.
I first saw this wheel in the documentary “Mestre Bimba a capoeira illuminada.” There it was demonstrated by Mestre Decanio, a capoeira mestre who used to use it in his own training. Since Decanio started to practice capoeira in 1938. It is safe to say this device was around in the 40’s or 50’s.
In the documentary he claims the device is part of a Danish form of excercise.
Greets.
Ab wheel. Well, this is a nice and a not so nice tool. 2 times out of three the last years, abwheel is the excercise that has given me intense and sudden back pain. Guess it has to do with core stability and technique. But now i have dropped the wheel for good.
Thanks for a good site
Jim, when you say straight arms do you mean locked-out elbows?
Any reason my elbows would be hurting while doing this?
hi, i was doing the roller exercise and found out tat i have been doing wrongly as my back was suffering , i tried following your steps and realized tat there is no much strains on my back anymore but my back still ache due to previous few sessions of exercise , should i continue to do or rest for now ? any advice ? thx in advance :)
How do you think using a barbell with 5lb plates compares to an ab wheel? And what about the grip width in terms of challenge?
i have been using the ab wheel rolling out from the knees for about 4 years. I am now 19 weeks pregnant and have still being using it but as i have got a bit larger i was wondering if it is still safe to use the ab roller when pregnant? Hope you can help,
Great tips….
I got a wheel for Christmas and just started using it, I’m fairly fit yet wanted to work on my abs. Have worked my way up to doing 3 set of 100 reps, wow my abs are sore today. Thinking I will not be using my wheel tomorrow, and use it again on Thursday. Thanks for all the info!
Great post, really interesting thanks
The best ab wheel tutorial on internets!
I weigh about 210 and use a 40lb. Weight vest. Found it to be very important keeping my back straight. This is a great exercise fwor stretching your core vs. The traditional core exercises that are more compact. One of the best ab workouts with the opportunity for variation in my opinion. Funny with all the an stuff on the market, a $7 wheel is the best. Stay with this one and you will see results.
Can you say what model ab wheel that is in the pictures?
Hello,
Thank you for this article. How many sets advise you every step?
Start with 3 to 5, and move up from there!
Thanks!
Thanks for all the tutorials.
Your experience with the ab wheel is very similar to mine.
Great workout, especially in combination with the levers and some power yoga/arm balance.
The transition from knees to a standing rollout is a big step indeed. My advise would be to use a TRX for that.
Just grab the two grips and copy the rollout-movement.
Gradually lower them to mimic the effect of the incline bench.
Worked great with me.
Thanks for this tutorial, you are really creative!
From now on I will use your tips to finally achieve my first standing roll out. Especially the decline one.
Cheers
Hello,
Could you please tell more about the positive aspect of this exercise on health?
Thank you in advance.
I had 2 herniated discs in my lower back in 1998 and went to physio and they showed me a few exercises to strengthen my back. While I was at the gym working out one day I discovered an ab wheel there. It seemed too easy doing the roll out on my knees so I tried it standing up. Did a few reps of this exercise standing up and my abs were very sore for about a week. I can now do 10 reps easily and hold it there for 5 sec.extended with my back slightly arched. Been doing this for over 5 years now with no pain even in my lower back.
can i do negative holds with the wheel? like rollout as far as i can stabilize myself in proper form, hold it, and continuously trying to get further?
This is super helpful to me!